
Setting up the Advanced Energy Basicbus Module for string communications of Thyro PCM SCR Controllers
, by Daniel Rehe, 3 min reading time
, by Daniel Rehe, 3 min reading time
Setting up the Advanced Energy Basicbus Module for string communications of Thyro PCM SCR Controllers
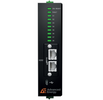
Customers report that the red X2 LED is on by default when they turn the Busmodule on. This is normal behaviour. This indicates the the Busmodule is configured for a controller however there is no controller connected. Or simply a mismatch between the selected controller and the controller which is currently connected to X1,X2...etc.

1) Connect a Micro USB to USB cable. Make sure that you are using a working data and power USB cable like what comes with your mobile phone.
2) On a windows 10 PC, Install the Thyro Tool Pro Software from the the CDRom provided by Fastron on request with the sale of a new Thyro Controller.
Note: for customer seeking to own a copy of Thyro Tool Pro please request a quotation from sales
Note: it is possible to connect directly to the thyro controller via the service USB port on the front left side, however you will need to install a different windows device driver.
3) Install the software driver located in the installation directory as follows
C:\ProgramFiles(x86)\Advanced Energy\Thyro-Tool Pro\Driver\Thyro-AX folder
contains the driver for our Thyro-AX, Thyro-A+ and Basic Busmodule
C:\Program Files (x86)\Advanced Energy\Thyro-Tool Pro\Driver\Thyro-AS
contains the driver for Thyro S, Thyro-A…3 series to connect directly
C:\Program Files (x86)\Advanced Energy\Thyro-Tool Pro\Driver\Thyro-PX
contains the driver for our Thyro-PX series to connect directly. Note: No busmodule is required for PX series. The comms is internally included as standards. Only the anybus device is required for each Thyro PX Controller
Note: you will need to install the Thyro AX Driver regardless if you are using Thyro S, Thyro A, Thyro AX, or Thyrp PX series controllers as this is the driver used for the basic busmodule.
3) Connect a Micro USB to USB cable. Make sure that you are using a working data and power USB cable like what comes with your mobile phone.
Note you can connect to one Thyro A directly through the Micro USB port on the front of the main controller left (left side). Or you can connect through the busmodule.
4) Load the Thyro Tool pro software . You will see the controller appear in the tree of devices on the left.
-Select Basicbus module
-Select parameters by double clicking the icon, then select hardware. Select the controller type form the drop down menu to remove the red X2 LED error and you will be ready to communicate. If no controller selected then select None.

If X22.1 is open, the unit is using the analogue setpoint only.
If X22.1 is on control ground, the unit is using the digital/fieldbus setpoint only.
If X22.1 is connected to the busmodule, the busmodule can decide
To activate it X22.1 terminal should be isolated and setpoint could be connected to X2.3(-) and X2.4(+)
Thyro A Series Quick Setup Guide
Anybus Setup Guide (Ethernet IP)
If you have any further questions please contact the friendly team at Fastron


