
Steps for setting up FCP Pattern Controller
, by Daniel Rehe, 4 min reading time
, by Daniel Rehe, 4 min reading time
We offer the FCP Series as a suitable replacement to Shinko PCB1, Here we explain the basic setup procedure for ramp and soak (pattern) control
Also please consider the wait function. Wait function will allow for if the timing is not enough to allow the set point to be reached. (i.e. in the middle of winter or the product is much colder than usual, you can set a wait value for the complete program. For example set wait value to 1(1 Deg C) the program step will not advance unless the PV temperature reaches within 1 Deg C of the set point temperature. Please make sure if using this function the last step needs to be set to above the ambient temperature otherwise the controller will be stuck in a loop waiting to reach the final step set temperature.
In this Blog article we show you the steps for setting up FCP Pattern Controller Program. We offer the FCP Series as a suitable replacement to Shinko PCB1, main differences is FCP is easier to use, however has only 4 programs each of 8 steps, and these can be interlinked for a 32 step single pattern.
In this blog article we walk you through setting up a FCP Series Pattern Controller for Ramp and Soak operation also referred to as step control sequence setting.
In this programming guide, our customer would like to ramp up as quickly as possible to 100 Deg C.
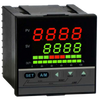
Power up the controller and you will see the PV/SV Display. Access Programming Level 3, by first entering the lock code in Programming Level 2.
To access programming level 2, Press SET key for 3 seconds
Press SET key multiple times to reach LCK. Then with left arrow and up or down key enter 0101 to unlock the controller system settings (Programming Level 3). Press and hold SET for 3 seconds to return to PV/SV Display.

Now access Programming mode 3 by pressing left arrow and SET at the same time for 3 seconds when on the main PV/SV display.

You will see INP1 on the top line, you can press up or down to change the input type and range as per below options.

Important Note: In order to access programming level 4, you need to use unlock code 0201 in LCK parameter as above. Then, when pressing left arrow and SET at the same time for 3 seconds when on the main PV/SV display, you will see ConF (Communication Function Setting) at first step
To do this you need to access PUNt parameter setting from programming Level 3. for testing we suggest set to minutes

Enter Programming Level 1 by pressing SET key once;
Press SET key until you reach PSEL. if send line shows 1 then you are in the program one setting. Press SET to see SV 1.1 and set to 100, then press SET again and set tr1.1 to 10 minutes. This will make the controller heat up to 100 Deg C in 10 minutes. Then you can see SV1.2 to 100 and tr1.2 to 5 minutes to allow the controller to hold 100 Deg for 5 minutes. Keep adding more steps until you have the desired program length. Note: If the controller does not reach the temperature in the set time period then you may need to adjust time of even better set the wait function in Programming menu 3
Set the wait value to 1.0 deg C to allow the program to NOT advance until it reaches within 1 Deg C of the set value (SV). Please note the last step set temp should be above ambient otherwise the controller may never finish the program.

One example is below

In Programming Mode 2, PV start will allow the controller to only start if the sensor is active.
If you prefer you can set the program start temperature to PV or to start at room temperature. Set to 0 if in doubt.


Once complete press SET for 3 seconds to return to main PV/SV display. Press A/M to start the program.
The full user manual can be downloaded here.
I hope this helped you. If still stuck you can contact us anytime at Fastron Electronics.


