
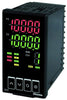
Simple BC Series setup of one or two Setpoint(SV1,SV2), with High limit on Temperature.
, by Daniel Rehe, 4 min reading time
, by Daniel Rehe, 4 min reading time
To setup a simple single setpoint (SV) with with high limit for preventing user errro in increaseing he setpiint beyond the limits of the heating chamber. We will also extend further to setup more than one setpoint (SV) if required
![]()
In this blog we will setup a simple single setpoint (SV1) with with high limit for preventing user error in increasing the setpoint beyond the limits of the heating chamber. We will also extend further to setup more than one setpoint (SV2) if required (Note the controller needs event input function for this feature).
In order to setup the BC Series controller from Shinko, we need to first set the input sensor type by accessing initial setting mode.

Sensor Types available are as follows

Once input type is set we want to set the SV1 and/or SV2 using the same process. Press the mode key until you reach the SV setting. Press up or down arrow to select the desired setpoint temperature. For example 60 Deg C
Note:If you want to use more than one SV then you will need the Event input option, such as BCS2R0009 or other opitons which include Event input feature. The even input has multiple functions and in our case we are looking to use "Set Value Memory" feature. With set value memory, you may have SV1, SV2, SV3, and SV4 with most BC series controllers.
First access the engineering mode menu and set the Event Input Allocation.

You have the following slection options. Set to the "set value memory" feature using the following menu and selections.

Once set you can press the mode(circle) key to scroll back to the main PV/SV display, or wait 1 minute.
How to use multiple SV in the controller? You will need to short out certain pins on the rear of the controller as indicated by DI1 and DI2 on the controller. Note that for more than 2 SV's you need to also set Event Input 2 Allocation to "set value memory"


Now we wish to limit the controller output to never exceed 75 Deg C. This is for safety and prevents another user increasing the temperature too high. To do this we need to set the OUT1 high limit in Sub Setting mode menu.

Set OUT1 to the desired high limit temperature. Make sure this temperature is above the Setpoint(SV1) which you have set. In our case we set to 75 Deg C.
Once you have entered the required high limit, you can press the mode key several times, or wait for the screen to return the default SV/PV Display
In some cases you may want to add some added assurance to prevent the controller output from functioning. In this case we recommend to use the controller alarm connected in series with the main relay output. The alarm should be set to De-energised, in order to allow the output to function until the alarm value point is reached
To set the alarm, you need to access Initial setting mode from the menu

Press the mode key to scroll down to Event output EV1 Allocation (or EV2 if using EV2). Select Process high alarm for an alarm which is independent to the setpoint(SV).

Once set, then press mode key several times of wait until the PV/SV Default display returns.
To set the alarm value, you need to either access the Sub setting mode here, or the Initial setting mode (above).

You should find the following additional options for setting alarm value, delay times, and hysteresis.

Set EV1 Alarm value to the desired over temperature value, and set the alarm action to De-energsied to make the alarm break the circuit rather than make the circuit.

If you have any further queries feel free to contact us


