
Basic Initial Setup of Hanyoung Nux VX series controllers for Fixed Point Control
, by Daniel Rehe, 3 min reading time
, by Daniel Rehe, 3 min reading time
In this example we will setup Hanyoung Nux VX series Controller for a Type K Thermocouple, PID Control OR ON/OFF control for a single setpoint of 150 Deg C
VX Series Full User Manual can be downloaded here.
To enter the basic menu, on the main display screen (after turn on)

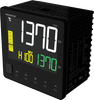
You will see the following on display
INP
KO
Press SET and you will see the KO flashing, then press up/down to scroll through the sensor types. once correct press SET again to save the settings.
You need to select the correct sensor type you have from below Note: KO and K1 are the available ranges ranges for type K sensors depending on your preference. If only measuring from -100 to 500 deg C you can have decimal point, otherwise if over 500 Deg C, then you only have full digit temperature display;

2A) Wait 1 minute for the display to revert back to default PV/SV display
Press SET, you will see the bottom numbers last digit flashing. Press up to set to 150 Deg C
Press SET again to save the SV.
2B) The controller RUN LED should light up followed by the OUT1 LED indicating the output. If Note you simply need to press  for 3 seconds and you will see the run display
Note this is PID control where it will approach temperature slower to avoid overshoot.
If there is too much overshoot, or the controller approcahes too slow, then we reccommend to trun on autotune function and run the process without any product in the heating chamber. This will set the PID values to their optimum value in 99% of cases.
If you need on off control please do the following:
Press and hold  for 1 second, then press
  buttons to get to Output Groupe as below.

Now Press Down Arrow to reach CNT1, Press SET to make the bottom row flash, then press up and down to change between PID, or ON/OFF Control.
Then you may need to change the Hysteresis to set for the turn on value once setpoint has been reached and the prcess starts to cool down. to do thsi you need to also be int he GOUT / Output menu as shown in 2C. Press SET then down arrow to Rach HYS settiong then set the Hysteresi to the desired value. for eaxmple if you want the heating to turn back on at 145 Deg C, then set HYS to 1.0.
Note the controller MUST be In ON/OFF Outptu control modle in order to see the HYS settings.
If you need further Support feel free to contact the friendly sales team at Fastron Electronics


