
Setting up Alarm with Hysteresis for Generic Digital Meters and Transducer Meters
, by Daniel Rehe, 1 min reading time
, by Daniel Rehe, 1 min reading time
Setting up Alarm with Hysteresis for Alish Meters and Transducer Meters
In this blog we show you how to setup Alarm with Hysteresis for Generic Digital Meters and Transducer Meters.
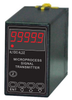
For this example we will use GMTA Transducer Meter with range of 100V. We wish to set the Alarm output to turn on if the voltage goes below 46VDC and to turn off when the voltage reaches 53.5V. We recommend you to download and read the user manual here.
- Power up the unit and press SHIFT/Left Arrow for 3 seconds. You will see AL1 flash on screen. Press left arrow to change the significant digit, and up and down to set the value for each digit. In this case we want the alarm contact to close when we reach 46VDC, so we set the alarm to 46V which corresponds to 0.46 x 99999 = 45999


