
Digital Panel Meter Scaling Setting
, by Daniel Rehe, 3 min reading time
, by Daniel Rehe, 3 min reading time
In this Blog we discuss the important steps in setting up Digital Panel Meter Display Scaling
In this Blog we discuss the important steps in setting up Digital Panel Meter Display Scaling
Note: It is important to note that the settings shown in the user manuals provided are generally NOT the default settings. You need to take care to keep track of the default settings or only adjust settings which you are familiar with.
First choose a simple Digital Panel Meter which you can provide the correct calibrated reference to test the final results later.
Q: What is Display Scaling?
A: Display scaling is the setting for what values you want to be displayed on screen for the maximum and minimum input range. The input can be process levels such as 4-20mA, 0-20mA, or 0-10V. In some cases we can have mains voltages of currents input, such as 0-600VAC. In our case we have -200mV to +200mV
1)Connect Auxiliary Power and open the product user manual to find the section regarding Display Scaling DSPL and DSPH. This the high and low scaling setting or the number you want displayed for the high and low range.
2)Remove the Front cover to access the display menu buttons. See below for their functions

4) Turn on the power to the meter and access the scaling Menu

5)Press and hold the up arrow(SW4) for 3 seconds to show doFSt on screen
6)Press the down arrow(SW5) to scroll to the required setting to change.
7)You will scroll through DGain, dP, and then you will reach dSPL and dSPH.
8)We suggest for low readings with only two digits, to set the decimal points to 1 or 2. To do this press the left arrow(SW3) and you will see the display change to show 0, then press the up or down arrow(SW5) and you will see the numbers change from 0,1,2,3. In this case we will use 1 decimal point.
9)Once you have the correct setting press enter(SW2) to save the setting and exit the menu
9) Repeat steps 5 to 9 , this time to access the display scaling setting dSPL and dSPH. Again press the left arrow(SW3) to change this setting. by default you should find dSPL = 0 and dSPH = 9999. This will display -9999-9999 for -200mV to +200mV input. In the case of unipolar input such as 0-200mV, the default setting should be 0-9999 for 0 to 200mV and you will use the same seting as described above dSPL = 0 and dSPH = (your desired full range display, I.e 100.0 for 100 Amp/200mV Shunt)
10) Change the dSPH value to 200.0 and press enter(SW2) to save the setting and exit the menu
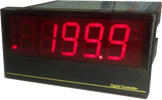
11) Connect your calibrated input for -200mV to 200mV and check that the display is as you intended. In our case -200mV will show -200.0 and for 0 input it will display zero, and finally for 200mV input it will show +200.0.
There may be the need for some additional tuning or offset adjustments due to discrepancy in the measurement voltage at the meter due to equipment tolerances or errors. This can be corrected. You can try to adjusting the scaling, or using doFSt setting found in scaling menu.
Drift or unstable/noisy measurements can usually be corrected by increasing the display filter setting, however do note this will slow down he response of the reading. This feature can be found in the system setting menu

For further advice feel free to contact out friendly sales team at Fastron Electronics
To see our range if Digital Panel Meters online see our online store


